The Delrin Desklamp
Homemade Illumination Equipment
My undergrad days were spoiled with both a wonderful machine shop and a welcoming culture of pals ready to pop the shop doors open for a fun side project. These days, I’m far away from a machine shop, so I took my lack of metal-working tools as a chance to build up a “vocabulary” of techniques with the other nearby machines.

Tools of the Trade
For now, “the other machines” are a 60[W] laser cutter, a couple hand drills, and an arbor press. Ok, I told myself,
Let's do this.
The laser cutter behaves not entirely unlike a printer. Vector graphics go in; sliced panels come out.
Repeatably.
Repeatably is key here when it comes to assembling projects from various mating panel geometries, all laser cut.
The laser cutter also excels at achieving tight tolerances for relative dimensions between features. What this means is that you can rely heavily on the fact that if you lase two holes into a plate and whip out the calipers to measure the spacing, you’ll consistently be able to achieve the dimension you sought for to within a range of about a thousandth of an inch (aka. a [mil]).
Ok, so the laser cutter works wonders for relative dimensions, but what about the dimensions of edges and pockets? Alas, since the laser is obliterating material to cut the part out, the inconsistencies within the “assumed continuum” of material will change how well the laser cutter cuts through. As a result, your edge and pocket dimensions have a “melty” edge that don’t always measure “the same” across identical parts. Luckily, this inconsistency is still fairly low (within a couple thousandths of an inch) and usually isn’t an issue unless you’re performing press fits with tolerances within a ten-thousandth of an inch. For those cases, I learned to design around it. All that said, with the right settings dialed in, I was (to my disbelief) able to consistently achieve press fits since most of the materials I cut were soft enough to allow slightly more deformation than metal parts normally would.
As for materials, 60[W] and a CO2 works conveniently for cutting wood, some plastics, rubbers, and unlaminated composites (i.e: fiberglass and carbon fiber in their unepoxied cloth form).
The Design
Joints
I was looking to be able to adjust the lamp to various angles and heights to get a better view of what I was doing. (Heh, I later learned that the 10[W] LED was so bright that the small height changes actually didn’t do much.)

To get the job done, I picked up some knurled screws from McFaster-Carr, although, for the patient, I’d recommend RAF for more choices.
These screws tighten down on the joint to keep the plates from rotating.
Delrin is **notorious** well known for being very slippery, which is why we can generally find Delrin being used as bearings and bushings.
To get around this issue, I laser-cut rubber washers to stick between the Delrin plates for a little more friction.
When it’s tightened down sufficiently–it works!
Base
The base platform is a “standoff-sandwich” of with two eighth-inch Delrin plates. The “standoff sandwich” does a pretty good job of increasing the base’s overall rigidity, despite Delrin’s eagerness to bend.
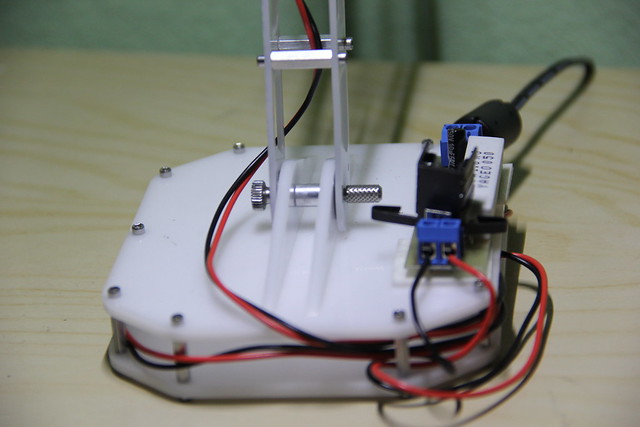
The circuit is just an LM338 (LM317’s beefier cousin) rigged as a constant current source to dump 800[mA] into the lamp LED. The LM338 gets pretty toasty, but it’ll do the trick until I get some time to put together a much more efficient switching power supply.
The Lamp Shade

Ok, I caved in here and scurried back to HMC on a weekend to borrow 20 minutes in the sheet metal shop. With a 1/16th[in] sheet of 3030 aluminum (the bendy grade), I bent together a quick lampshade/heatsink and smoothed the edges with the notcher.
Field Testing
All-in-all, the lamp gets the job done, but there are a couple of drawbacks.
First, I wasn’t expecting torsional stiffness to be an issue, but since the lamp is essentially one huge beam rigidly fixed to a solid base, it’s going to flex. Just how much flexing would be a good project for a Solidworks simulation, but it may also be a characteristic I could overcome with heuristics (by which I mean… soap bubbles?) or some approximate hand-calcs, rather than a fancy-pants software package.
All that said, the lamp sways when you give it a finger-flick. It sways… and sways–and the beam of light sways with it. (Update: I actually directly address this issue in V2.)
The second issue is that the knurled screws in the Delrin joints need a serious amount of hand torque to crank them down such that the joints hold their position. As of now, I’ve discovered that the screws aren’t applying the tightening force directly on the rubber washers; hence the lamp joints don’t resist sliding as easily as they could.
Despite these drawbacks, though, it definitely serves up a steady beam that makes it sufficiently worthy of “desklamp-hood!”